Gluten-free Oatmeal Raisin Cookies

Posted on
Gluten-free Oatmeal Raisin Cookies

I love oatmeal. It’s comforting and reminds me of country-side flavors. But, when you are gluten-free, it’s a grain you have to be careful with, because most brands are cross-contaminated with wheat products. Bob’s Red Mill has certified gluten-free oats, which I like to cook with from time to time. This recipe for oatmeal raisin cookies has inspired me to make my own healthy version (yields 30 cookies).

Not too sweet but impossible to put down!

Not too sweet but impossible to put down!

Ingredients:

  • 1/2 cup butter, softened
  • 1/4 cup sugar
  • 1/2 packed brown sugar
  • 1 egg
  • 1 teaspoon vanilla extract
  • 1/2 cup tapioca starch
  • 1/2 cup brown rice flour
  • 1/4 cup amaranth flour
  • 1 teaspoon baking soda
  • 1/2 teaspoon guar gum
  • 1/2 teaspoon salt
  • 1/2 teaspoon ground cinnamon
  • 1 cup certified gluten-free oats
  • 1/2 cup raisins, rehydrated
  • 1/2 cup chopped pecans

Preheat the oven to 350F.

In a large bowl, cream the butter and sugars until light and fluffy. Beat in the egg and add vanilla. Mix well.

In a different mixing bowl, combine all the dry ingredients (tapioca starch to oats, on my list). Add to the cream mixture and mix well.

Fold in the rehydrated raisins (just soak them in warm water for 30 minutes to rehydrate them) and pecans.

I know it's hard, but don't eat all the dough raw, it's even better once baked!

I know it’s hard, but don’t eat all the dough raw, it’s even better once baked!

Shape the dough into small 1″ balls and place them on a baking sheet lined with parchment paper. Make sure to leave a few inches between the cookies because they flatten and expand while baking.

Bake for 11-12 minutes, until golden brown. Let cool and serve with a big glass of milk. Perfect for dessert or breakfast!


Butter Pecan Ice Cream

Posted on
Butter Pecan Ice Cream

It’s June. The heat and humidity are already unbearable. It makes me want to learn delicious, healthy frozen recipes to help endure the heat. I found a butter pecan ice cream recipe while browsing the Internet, and after three tries and a few changes in quantities and ingredients, I can finally say that I’m proud of the result.

Here’s what you need:

I didn't have a pretty bowl, so I served my ice cream in a cantaloupe.

I didn’t have a pretty bowl, so I served my ice cream in a cantaloupe.

Ingredients:

  • 1/3 cup chopped pecans
  • 1 Tablespoon butter
  • 1 teaspoon sugar
  • 1 1/2 cup whole milk
  • 3/4 cup packed brown sugar
  • 2 eggs, lightly beaten
  • 1/2 cup heavy cream
  • 1 teaspoon vanilla extract

The first step is to lightly toast the pecans. In a skillet, melt the butter over medium heat and add the pecans. Constantly stir for 2 minutes, then reduce heat, add a teaspoon of sugar and stir for another 2 minutes. Be careful not to burn the pecans. Remove from heat and cool.

In a double boiler, heat the whole milk. When it starts to bubble but before it boils, add the brown sugar and stir until dissolved.

Pour some of the hot cream mixture (just around 1/2 cup) into the eggs and whisk. Return the egg and cream mixture to the double broiler. Cook over low heat and stir constantly until the mixture coats the back of a metal spoon. It takes 3 minutes.

Remove from the heat and immediately cool the pan in a bowl of ice water, to fully stop the eggs from cooking. Stir for 2 minutes and refrigerate.

In a mixing bowl, pour the heavy cream and vanilla extract. Whip the cream so it expands and stop before it forms soft peaks. Refrigerate with the custard mixture overnight.

The next day, combine the heavy cream and custard. Pour in your ice cream machine (1 quart), add the toasted pecans, and follow the manufacturer’s instructions. I let mine churn for about 12 minutes.

Eat as is, or place in a plastic container in the freezer to let it harden. Et voilà!

Paleo Whipped Cream

Posted on
Paleo Whipped Cream

I’m not gonna lie, I’m pretty proud of myself. After a week of experimenting with coconut milk, I finally made a paleo whipped cream with a taste I can’t get enough of. It’s fluffy, rich, tasty, sweet and the coconut flavor isn’t overwhelming. My secret? Maple syrup and orange zest. A quick trip to the store, and you’re ready to get started!

Citrus flavored, yum!

Citrus flavored, yum!

Ingredients:

  • 2 15oz can unsweetened, full fat, coconut milk
  • 1 teaspoon vanilla extract
  • 7 strawberries
  • Zest of 1 orange
  • 1 Tablespoon orange juice
  • 1/4 cup maple syrup
  • 2 teaspoon coconut flour
Refrigerate the discarded coconut water for later use.

Refrigerate the discarded coconut water for later use.

Leave the cans of coconut milk in the fridge for at least 2 hours, preferably overnight. After being refrigerated, the “cream” will rise on top, and the coconut water will be at the bottom. Separate the “cream” and drink the water, or store for other recipes.

In a food processor, blend the strawberries, vanilla, orange zest, orange juice and maple syrup, until liquid. It should yield about a cup.

With an electric mixer, whip the coconut milk in a large bowl. When it starts to thicken, slowly add the fruit and maple syrup. Keep whipping for 4-5 minutes.

Healthy paleo snack

Healthy paleo snack

Add 2 teaspoon of coconut flour to help thicken the whipped cream. It needs it since I added a cup of liquid flavoring!

Store back in the fridge as soon as possible to keep a thick, fluffy texture.

Now, you have a healthy, delicious, paleo whipped cream for all your recipes!


Gluten-free Tuna Casserole

Posted on
Gluten-free Tuna Casserole

I remember making tuna casserole before going gluten-free, using canned cream of mushroom soup. It was pretty easy and delicious. However, the ingredients in canned cream of mushroom soup are a complete turn off: soybean oil, wheat flour, MSG, etc. So I found a recipe for tuna casserole from scratch and went about gluten-freeing it and here it is:

All the rich creamy taste and none of the guilt!

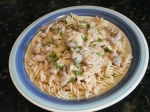
All the rich creamy taste and none of the guilt!

Ingredients:

  • 6 Tablespoon of butter, divided
  • 1 small onion, finely diced
  • 1 stalk celery, finely chopped
  • 1 clove of garlic, minced
  • 8 ounces of mushrooms, sliced
  • 1/4 cup potato starch
  • 1 cup milk
  • 1 cup heavy cream
  • Salt and pepper to taste
  • 15 ounces canned tuna
  • 1 cup frozen peas, thawed
  • 1 cup shredded cheddar cheese
  • 16 ounces gluten-free pasta (I use brown rice pasta)

Preheat oven to 375F and grease a medium baking dish. Set aside.

Bring a large pot of water to boil (I add a little salt and olive oil to my water). Add the gluten-free pasta and cook according to the manufacturer’s instructions.

In a large skillet over medium heat, melt 2 Tablespoon of butter and add the onions. Cook until translucent, then add the celery, garlic and mushrooms. Cook until the mushrooms are golden, about 10 minutes. Set aside.

Potato starch subbed in for flour beautifully in this roux based sauce.

Potato starch subbed in for wheat flour beautifully in this roux based sauce.

The base of the creamy sauce is a roux. Melt 4 Tablespoon of butter in a medium saucepan and whisk in the potato starch until smooth.

Combine the milk and heavy cream in a measuring cup and gradually add to the roux, while whisking the entire time. Continue to cook for 5 minutes until thickened and the mixture is creamy and smooth. Season with salt and pepper. Set aside.

This is coming together nicely!

This is coming together nicely!

In a large mixing bowl, stir in together the tuna, peas, mushroom mixture and roux-based sauce. Set aside.

When the pasta is ready, drain and add to the tuna mixture. Gently stir. Pour in the greased baking dish and add cheddar cheese on top.

Bake 25 minutes in the preheated oven. Let cool 10 minutes and serve!

Gluten-free Profiteroles

Posted on
Gluten-free Profiteroles

So… I was watching Anne Burrell make profiteroles on the Food Network this weekend and her dough was doing such wonderful things (!) that I thought to myself, “I can ace this gluten-free”. And it’s true; pâte à choux isn’t exactly liquid, but it’s not doughy enough that the texture becomes a problem when trying it with gluten-free flour. If you’ve never baked before, this is a good recipe to start with.
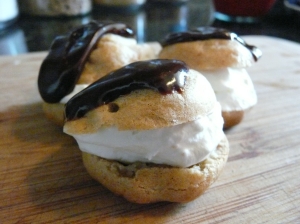
It looks crazy fancy and nobody will know it only took 10 minutes prep time!

It looks crazy fancy and nobody will know it only took 10 minutes prep time!

Ingredients for the dough:

  • 1/2 cup water
  • 1/2 stick butter
  • 1/4 cup tapioca starch
  • 1/4 cup brown rice flour
  • A pinch of salt
  • 2 eggs
  • A pinch of ground cinnamon

Ingredients for the whipped cream:

  • 3/4 cup heavy cream
  • 1 teaspoon vanilla
  • 2 Tablespoon honey

Ingredients for the chocolate ganache:

  • 4 ounces dark chocolate (or semi sweet)*
  • 1/4 cup heavy cream
  • 1 Tablespoon butter

* Choose a chocolate without soy lecithin so it’s healthier!

Alright! Line a cookie sheet with parchment paper and preheat the oven to 425F.
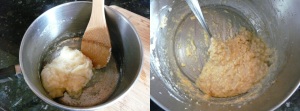
It doesn't look anything like dough, but just trust that this is what you want!

It doesn’t look anything like dough, but just trust that this is what you want!

In a small saucepan, combine water, butter and salt. Bring to a boil. Reduce heat and add the flour (tapioca starch and brown rice flour) all at once. Stir vigorously with a wooden spoon until the mixture has cooked enough that it looks like a gooey ball of mashed potatoes.

Transfer to a mixing bowl and let sit 5 minutes to prevent the eggs from cooking.

Perfectly golden!

Perfectly golden!

Beat in the eggs one at a time (this step is a bit of a workout) until fully incorporated. Add cinnamon and beat in some more. It should look like cooked oatmeal.

For the next step, you need either a pastry or piping bag, a cake decorator like mine, or you can improvise and use a Ziploc bag with a small hole in a corner.
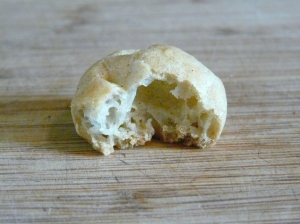
Look how airy and fluffy this is! Yes, it's gluten-free!

Look how airy and fluffy this is! Yes, it’s gluten-free!

Fill the bag with the dough mixture and pipe little 1 inch balls onto the parchment paper, leaving at least an inch in between, because they expand quite a bit in the oven.

Bake in the 425F oven for 18-20 minutes. Take them out and let cool 15 minutes before cutting them in half.

While it cools, make the whipped cream. It takes about two minutes. Just use an electric mixer and start beating the cream.

When it starts to harden, add vanilla and honey and whip some more. Refrigerate until ready to assemble.

Usually, chocolate ganache requires a double boiler, but I found great instructions on how to make it in the microwave. So easy! Just heat the cream and butter in the microwave until it boils and pour it on the chocolate chunks. They will melt right out while you stir.

Almost done!

Almost done!

And now it’s time to put everything together. Sandwich the whipped cream on the bottom half of a profiterole and place the top on. Pour chocolate ganache over. Serve to your guests and feel pride as they compliment you!

I can’t wait to try this recipe the paleo way. I think it’d be easy to sub in almond flour for brown rice flour, lard for butter and coconut cream for heavy cream and there, paleo profiteroles!

Homemade Mayonnaise

Posted on
Homemade Mayonnaise

I hate store bought mayonnaise even though it’s naturally gluten-free. It’s not the taste; it’s the ingredients. Let’s pile on some more transfats on top of this processed food please, yum! I think homemade mayonnaise is one of those recipes everyone should know how to make. It’s super easy if you have an electric mixer. It’s super easy without one too, it’s just more of a workout. Here’s how I made mine:

The red palm oil made my mayo so colorful!

The red palm oil made my mayo so colorful!

Ingredients:

  • 2 egg yolks
  • 1/2 teaspoon apple cider vinegar
  • 1 teaspoon Dijon mustard
  • 4 teaspoon lemon juice
  • 1 teaspoon salt
  • 1 1/4 cup extra virgin olive oil
  • 1/4 cup red palm oil

In a bowl, whisk together (by hand) all the ingredients, except the oils. This is just to break the yolks and blend the flavors.

Using an electric mixer, keep whisking the egg yolk mixture while adding the oil very slowly, about 1/4 teaspoon at a time, over a few minutes.

Mayonnaise is an emulsion. It means it’s a mixture of two liquids that normally can’t be combined. Constantly whisking while adding the oil slowly, allows for the liquids to combine.

Once the mayonnaise starts to hold together, you can add the remaining oil in a slow, steady stream, while whisking.

Keep the mayonnaise chilled in the fridge. I used fresh cage free eggs, and my mayo still tasted good after a week. I used it to make russian dressing, devilled eggs, potato salad and bacon/lettuce/tomato wraps. And of course, with my left over egg whites, I made meringue!

Gluten-free Beef Stroganoff

Posted on
Gluten-free Beef Stroganoff

You might think that making gluten-free beef stroganoff only involves replacing the noodles, but be careful: most recipes call for flour to thicken the sauce. Don’t worry, it’s easily replaceable with tapioca starch. I had never made this dish before, so I used this popular recipe as a guide. Here is my gluten-free variation:

A simple dish to add to my gluten-free arsenal.

A simple dish to add to your gluten-free arsenal.

Ingredients

  • 1 1/2 pound beef sirloin (or chuck roast)
  • 8 ounces mushroom, sliced
  • 2 medium onions, diced
  • 1 garlic clove, minced
  • 1/4 cup butter (half a stick)
  • 1 1/2 cup beef broth*
  • 1/2 teaspoon salt
  • 1 teaspoon fish sauce
  • 1/4 cup tapioca starch
  • 1 cup sour cream
  • 1/2 cup heavy cream
  • 16 ounces gluten-free pasta *
  • Fresh parsley for garnish

* I put an asterisk next to these ingredients because what you choose determines how healthy this dish will be. I used Medford Farms all natural beef stock. Make sure you read the ingredients, because beef stock is not always gluten-free. For my pasta, I chose Tinkyada brown rice spirals.

The first step is to cut the beef into thin strips, across the grain, about half an inch thick. Set aside.

Over medium heat, sautee the onions, garlic and mushrooms in butter, stirring often. Cook until the mushrooms are golden brown and caramelized. Remove from skillet and set aside.

Yummy!

Yummy!

In the same skillet, cook the beef until brown. Measure one cup of beef broth, add salt and fish sauce to it, and add to the skillet. Heat to boiling, then reduce heat and cover for 15 minutes while it simmers.

Mix in the remaining beef broth with the tapioca starch. Add to the beef. Then, add the onion and mushroom mixture in the same skillet and heat to boiling, stirring constantly. Boil for one minute and reduce heat.

Mix the heavy cream and sour cream and add to the skillet. Stir until hot and serve over rice pasta (cook them according to manufacturer’s instructions). Add fresh parsley to taste, for garnish. I found this dish was not as good reheated then fresh out of the kitchen, so plan accordingly!

Honey Walnut Shrimp

Posted on
Honey Walnut Shrimp

Within days of discovering this recipe, I had to try it for myself. I love shrimp, I love honey, I love walnuts. Plus, it’s all naturally gluten-free! I subbed in a couple of ingredients though; I don’t like using mayonnaise as it is filled with polyunsaturated fats. Here’s what I did:


Never cooked shrimp before? Not a problem! This recipe is very simple!

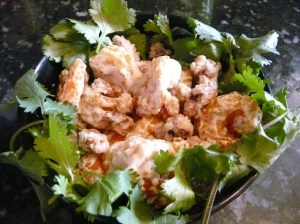
Never cooked shrimp before? Not a problem! This recipe is very simple!

Ingredients for the shrimp:

  • 1 pound raw shrimp (peeled and deveined)
  • 1 egg white
  • 1/2 teaspoon salt
  • 1/2 cup tapioca starch
  • 1/4 cup potato starch
  • Red palm oil (for frying)

Ingredients for the dressing:

  • 1 Tablespoon condensed milk
  • 1 Tablespoon honey
  • 2 teaspoon lemon juice
  • 5 Tablespoon plain greek yogurt
You can make candied walnuts for a quick snack, too!

You can make candied walnuts for a quick snack, too!

Ingredients for the candied walnuts:

  • 1 cup walnut halves
  • 1/2 cup water
  • 1/2 cup sugar

Once the shrimp are cleaned, peeled and deveined, pat them dry with paper towel. In a large bowl or plastic container, beat the egg white (very briefly: no peaks, just bubbles). Add salt and mix the shrimp in. Let marinate 30 minutes.

Making candied walnuts is very simple. In a small saucepan, boil the water. Add sugar and stir until fully dissolved and slightly thickened. Add the walnut halves and lower the heat to medium. Stir until the mixture is caramel colored. Set it to dry on a sheet of parchment paper (try to leave space between the walnuts so they don’t stick).

Red palm oil is the healthiest for deep frying.

Red palm oil is the healthiest for deep frying.

For the dressing, mix all the ingredients together in a small bowl and set aside in the fridge until ready to serve.

When the shrimp have marinated long enough, remove them to a new bowl but leave the extra egg white and liquid behind. Coat them in the potato/tapioca starch mixtures.

Almost there!

Almost there!

In small batches, fry in a deep fryer at 375F for around 3 minutes, until they are perfectly golden.

Let the extra oil drain on a paper towel. Once dry, put the shrimp in a large mixing bowl and add half the dressing. Toss. Add the candied walnuts and more dressing, to taste.

I served mine with steamed brocoli and rice pilaf. It was delicious!

Gluten-Free Oreo Cookies

Posted on
Gluten-Free Oreo Cookies

Who doesn’t love oreos? Chocolaty goodness with a delicious creamy sweet filling, dipped in milk. It’s a great snack and guess what, you can easily make a gluten-free version at home in 20 minutes (prep time). After experimenting for many months, I’m finally completely satisfied with my recipe. Aside from sugar, which is alright in moderation, you can eat these cookies completely guilt-free! Here’s what you need:


Just like the real thing, but better!

Just like the real thing, but better!

Ingredients for the cookie:

  • 1 stick butter, softened
  • 1/2 cup powdered sugar*
  • 1/2 cup cocoa powder
  • 1 teaspoon vanilla extract
  • Pinch of salt
  • 1/4 cup tapioca starch
  • 1/4 cup amaranth flour
  • 1/4 cup brown rice flour
  • White rice flour for rolling

Ingredients for the frosting:

  • 1 stick butter, softened
  • 1 teaspoon vanilla extract
  • 1 1/2 cup powdered sugar*

*I put an asterisk next to powdered sugar because I prefer using powdered sugar made with tapioca starch instead of corn starch, like Organic 365, which you can find at your local Whole Foods.

It doesn't look like much, but once rolled out, you'll get lots of cookies!

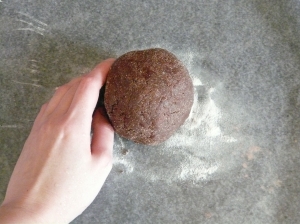
It doesn’t look like much, but once rolled out, you’ll get lots of cookies!

The dough is easy to make. Cream the butter and sugar in a large bowl. Add vanilla extract. Slowly add the cocoa powder, salt, starch and flour. It’s going to get really thick. Just knead it with your hands. Wrap it up in floured (white rice flour is what I use for sprinkling and rolling) wax paper and cool it in the freezer for 10 minutes, or in the fridge for an hour.

The dough is a lot easier to work with than I expected.

The dough is a lot easier to work with than I expected.

Next, preheat the oven to 350F. Place parchment paper on a cookie sheet and set aside. On a clean work surface, sprinkle white rice flour and start flattening the dough with a rolling pin to about 1/8 inch. Using a cookie cutter, get as many cookies as you can! It should yield around 30 cookies but you’ll have to reroll the dough a few times. No wasting allowed!

Bake 7 to 8 minutes. After they have cooled at least 15 minutes, use a spatula to get the cookies off the wax paper and on a plate.

The last step is to make the frosting.

Simply cream the butter and powdered sugar and add vanilla extract. Using a knife, spread a generous amount of frosting on a cookie and sandwich it with another.

Enjoy the healthiest oreo cookies ever!

Gluten-free Salmon Croquettes

Posted on
Gluten-free Salmon Croquettes

This delicious seafood entrée is my first new recipe in a long time. I am just getting back on my feet after extensive ankle surgery, and I wanted to make a meal with very little prep time, without sacrificing taste. Salmon croquettes turned out to be the perfect dish. They’re not only gluten-free, they are completely grain-free and all the ingredients are easy to find and inexpensive.

Fried to perfection!

Fried to perfection!

Ingredients

  • 1 15 oz can salmon
  • 2 medium-sized potatoes
  • 1 stalk of celery, diced
  • 1 onion, diced
  • 1 egg
  • 1 teaspoon salt
  • 1 teaspoon sugar
  • 2 teaspoon parsley
  • 1/4 teaspoon paprika
  • 1/4 teaspoon black pepper
  • Red palm oil for frying

First, peel, boil and mash the potatoes (do not add butter or milk). Refrigerate for at least an hour. This is the key to a perfect texture; the mashed potatoes need to be cold.

Open the can of salmon and drain most of the liquid (keep the bones!) In a large bowl, gently mix in all the ingredients with a fork. Shape the mixture into small croquettes. Note that you can make them larger if you want to use them as patties instead.

Deep fry in red palm oil (or another good oil you have access to) at 370F for 2-3 minutes. I was able to fry about 6 at a time and had a total of 20 croquettes.

I look forward to making this dish again, especially because I only had to be on my feet 10 minutes!